The Marshal Stack guide
Everything the app does, screen by screen — from the demo to your own projects, servers and alerts.
Getting started
Marshal Stack is a console for what you ship: your apps in the stores, the servers behind them and the sites people visit. The iPhone app is the console, a relay gathers the data, and a small agent on each of your servers reports its load.
Install the app from the App Store. On the first screen, tap Explore with demo data to look around with sample projects and servers — nothing to sign up for. A Demo mode bar stays on top; tap Connect when you are ready for your own data.
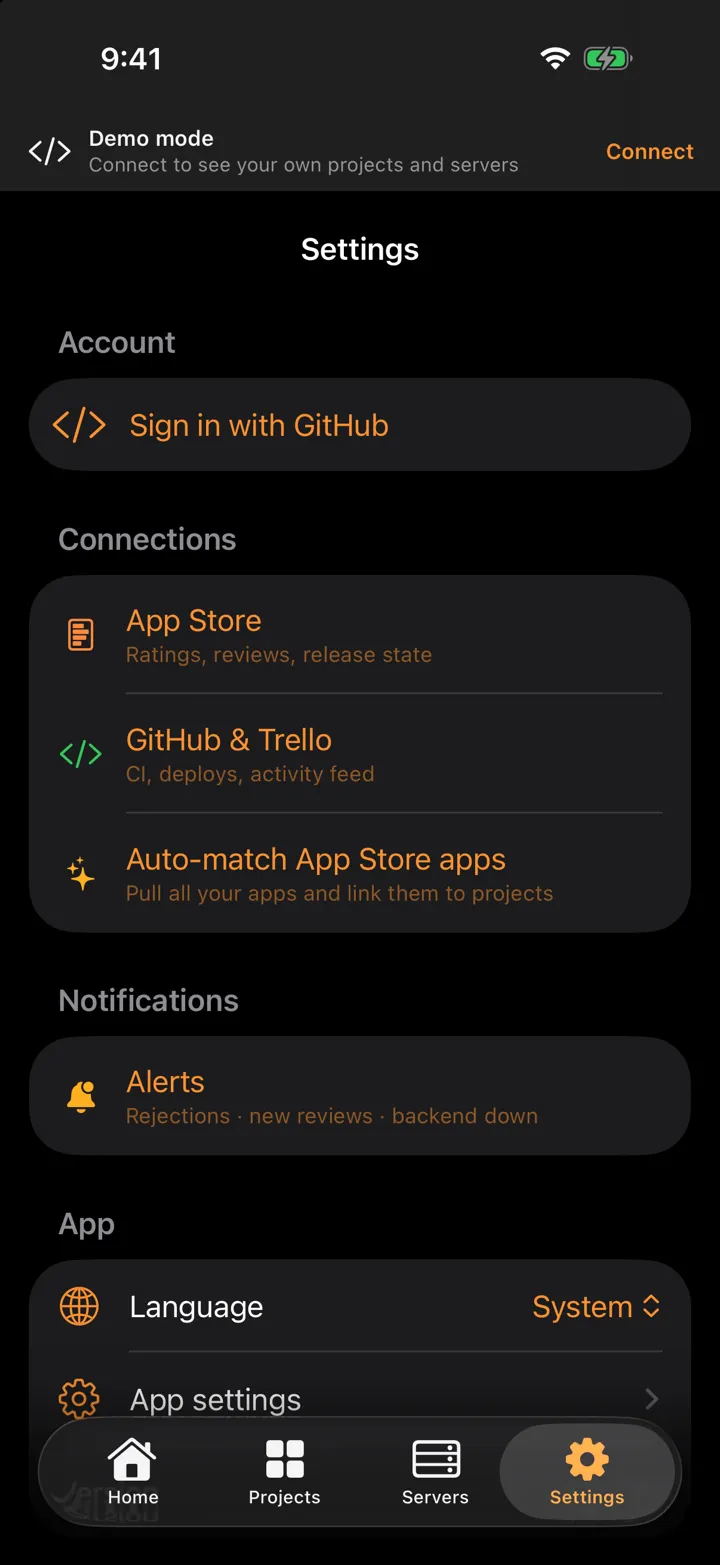
You sign in with GitHub. Your projects, servers and keys belong to that account: Settings → Account has Log out, and Delete account removes everything. The app speaks English and Russian — switch in Settings → Language.
Home
Home is the one-glance summary. On top, a card per server with CPU, memory and disk: green is fine, orange wants attention, red is critical. Fold the section with its arrow when you don't need it.
Below, a card per project with its current tasks and a status — Working, Needs you, Stopped, Paused, Idle. Tap a project to see its whole checklist: Next, Backlog, done this week. Tasks come from the GitHub and Trello boards you connect.
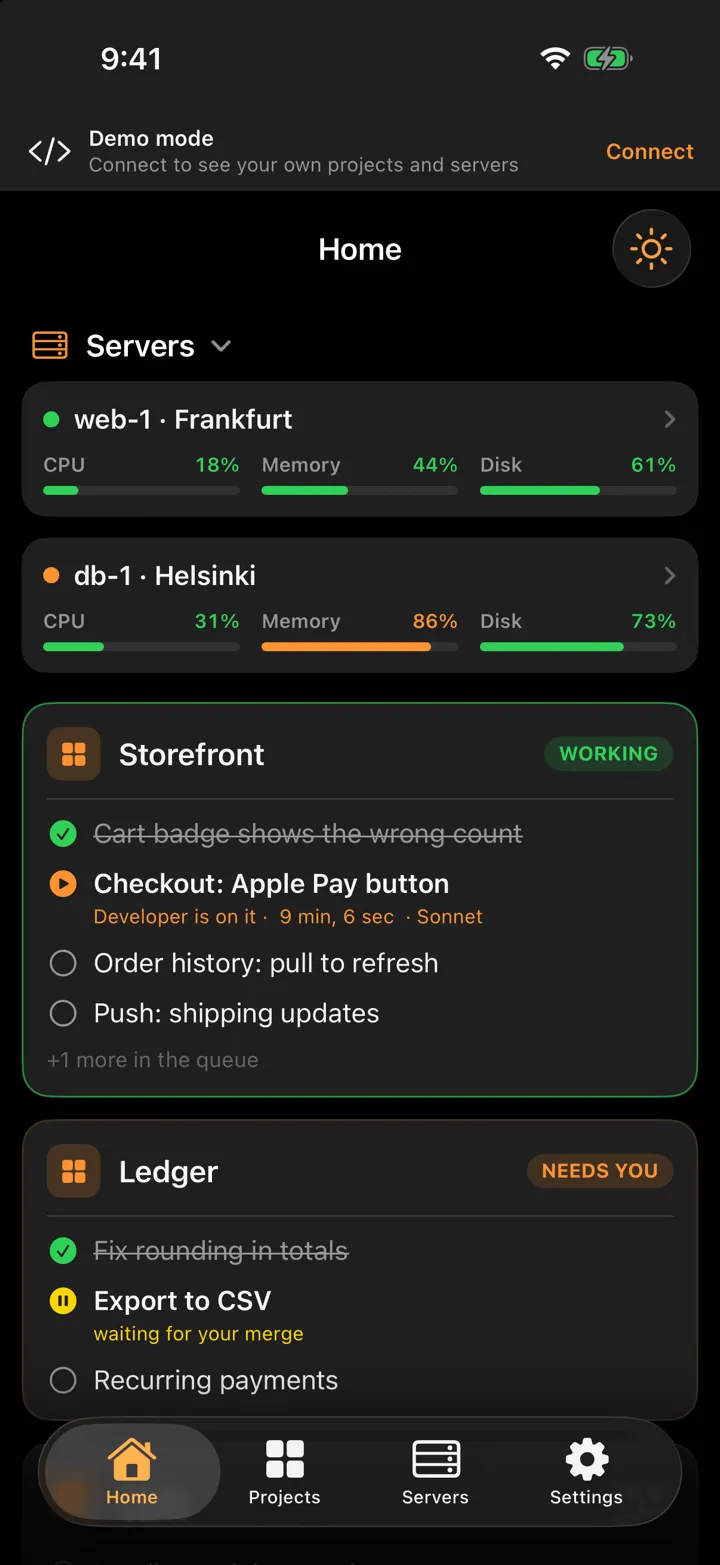
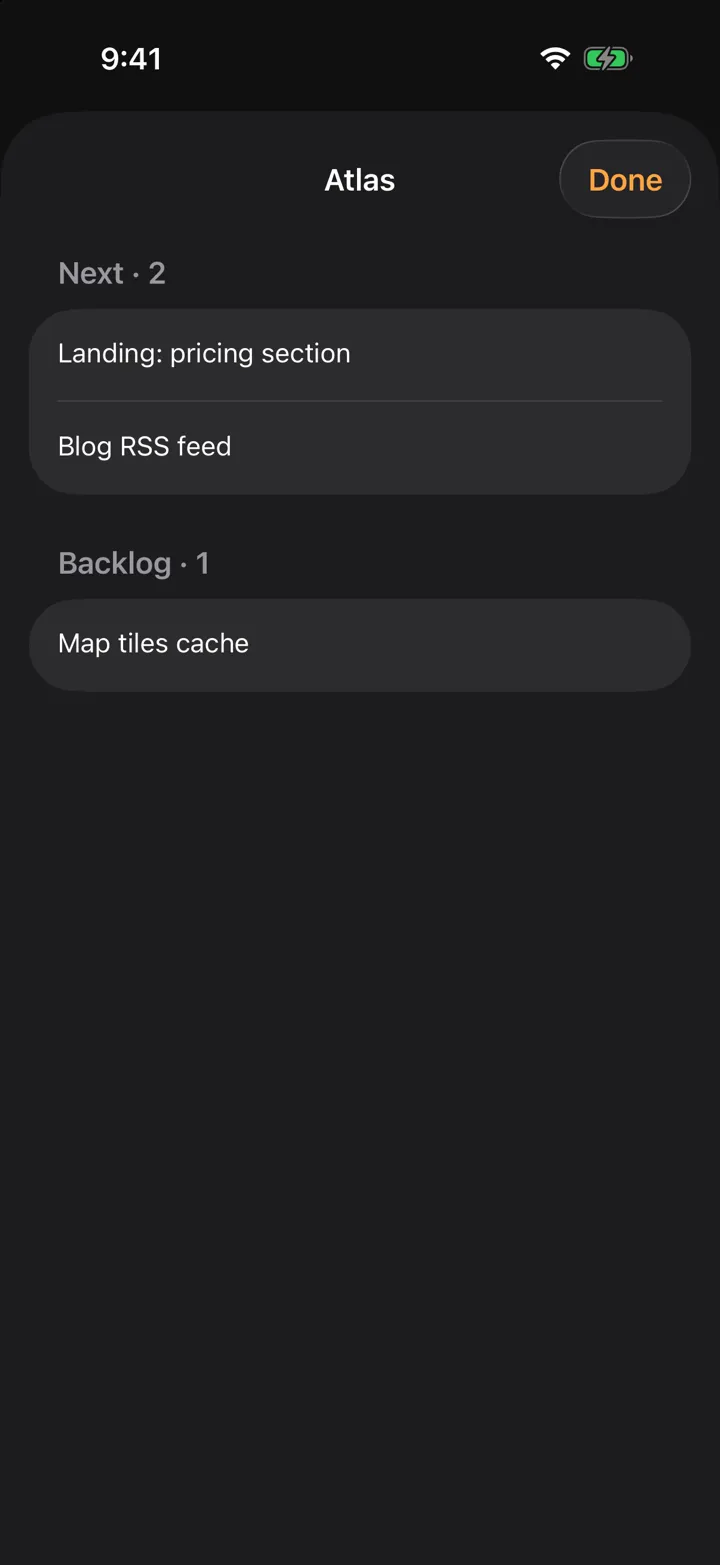
The sun button keeps the screen on — handy for a phone on a stand used as a wall monitor.
Projects
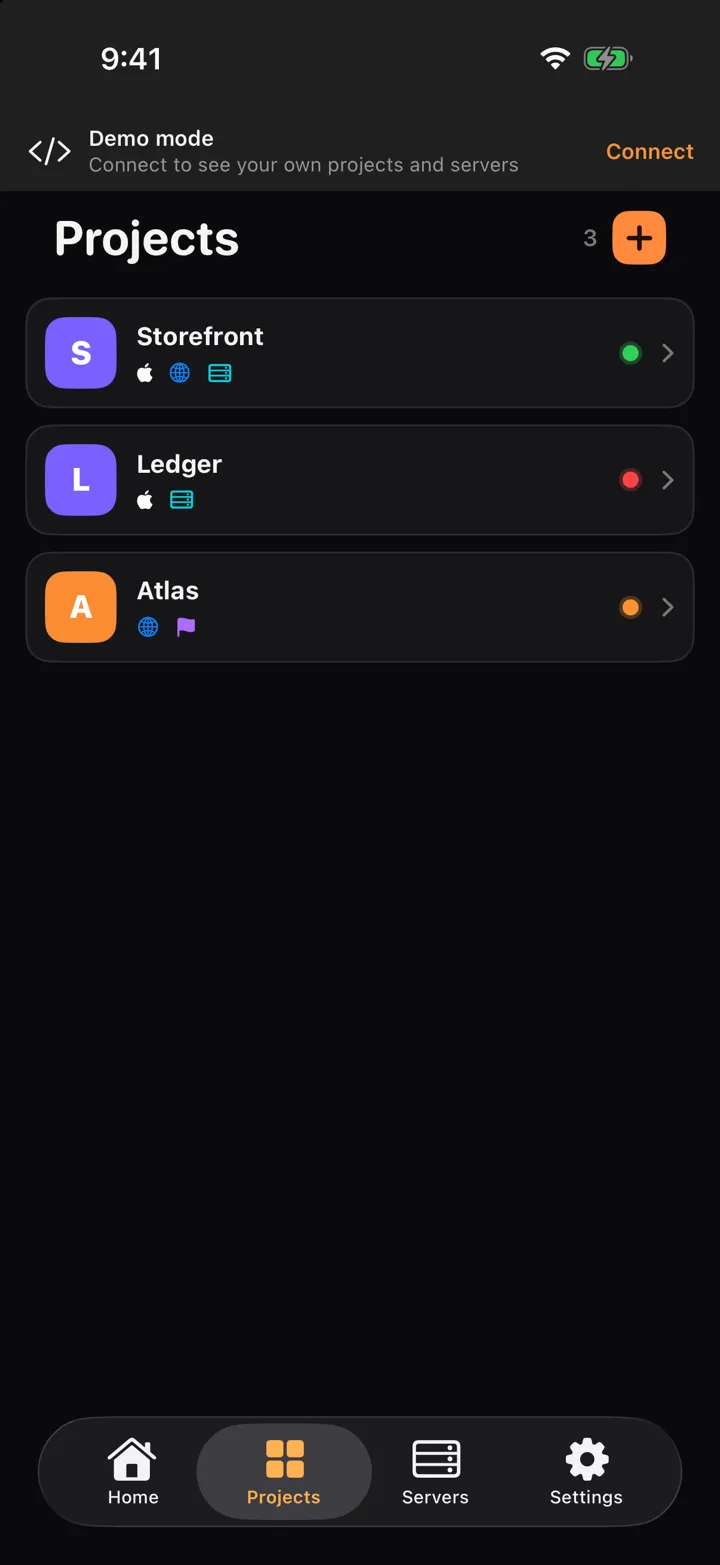
A project is everything behind one product: its apps in the store, its site and backend, its repositories. The dot beside each one shows its health at a glance.
Add projects from GitHub
On the Projects tab, tap + and pick your repositories. Each one becomes a project you can rename and fill in later.
Connect the App Store
Open Settings → Connections → App Store. In App Store Connect go to Users and Access → Integrations → App Store Connect API, generate a key, then paste its Key ID, the Issuer ID and the .p8 file. Ratings, reviews and release state are then pulled with your own key.
Match apps to projects
Auto-match App Store apps in Settings pulls every app on the account and links each to its project. You can also attach apps by hand in a project's Edit screen.
Watch your addresses
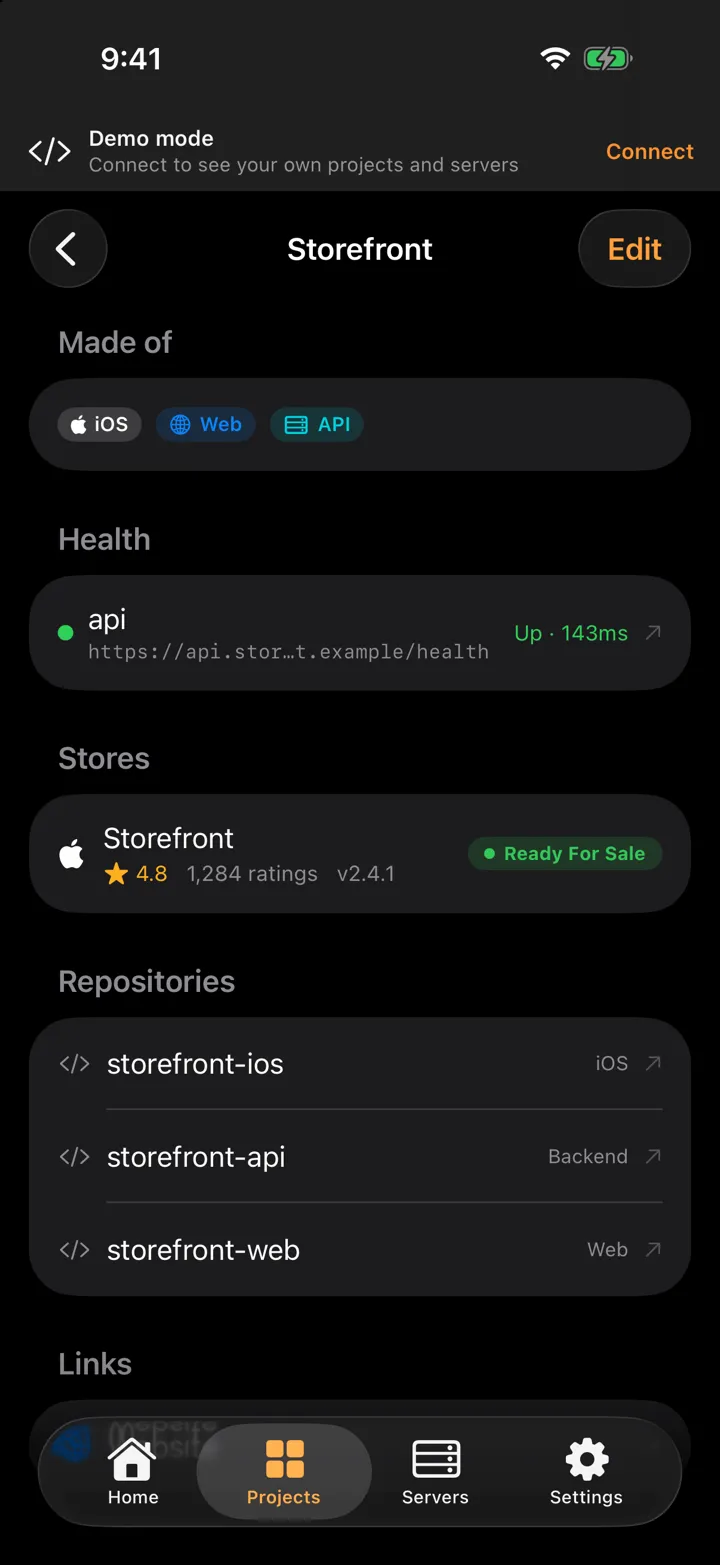
In a project's Health section, tap Watch an address and give it a label (api, web…). It is checked every minute; a push arrives when it stops answering twice in a row, and again when it recovers.
Open a project to see what it is made of, its health with response time, store ratings, repositories and links. Edit sets the name, website, backend, health URL and admin panel link.
Servers
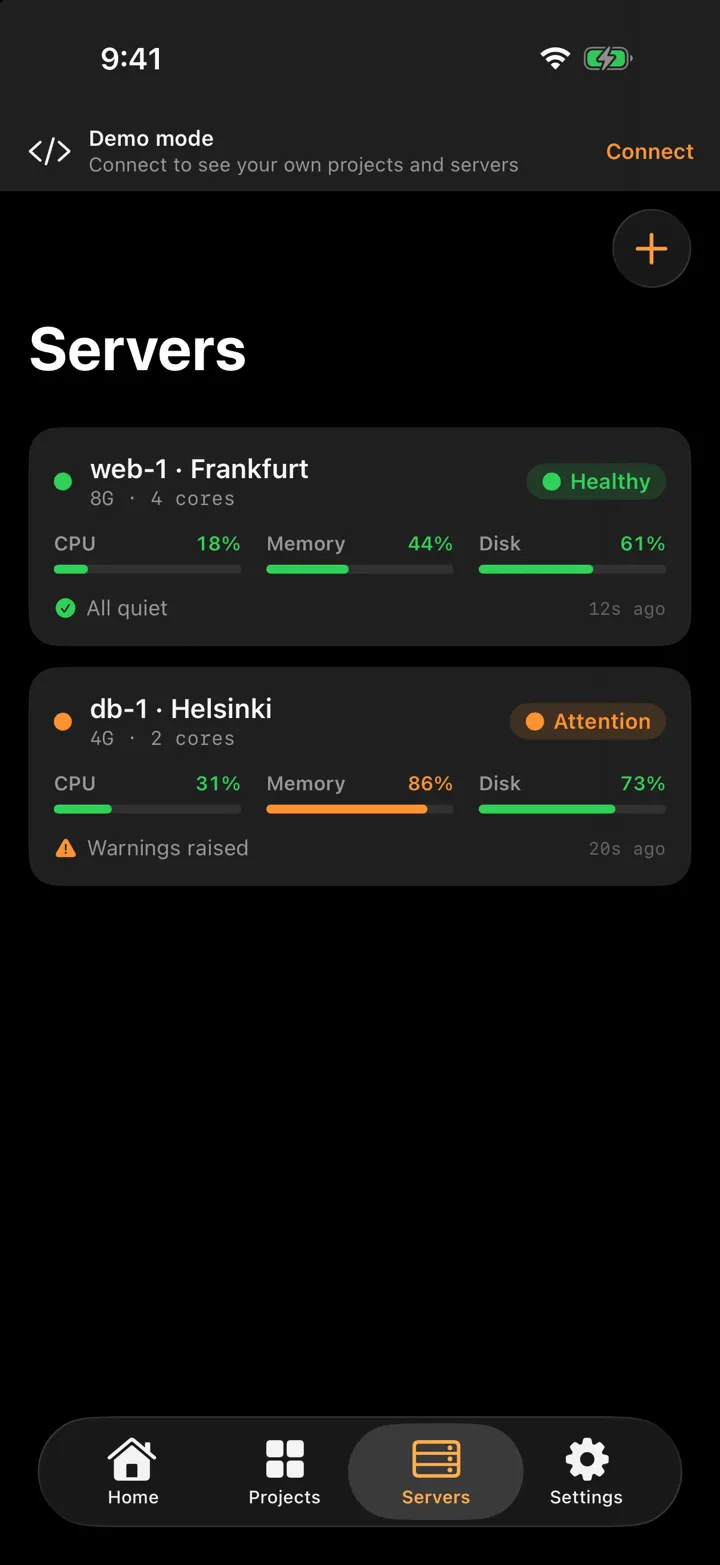
Connect a server and you see its load, its heaviest processes and its alerts. Any Linux server with systemd will do — a small VPS is enough. Three steps, about a minute.
Get the command
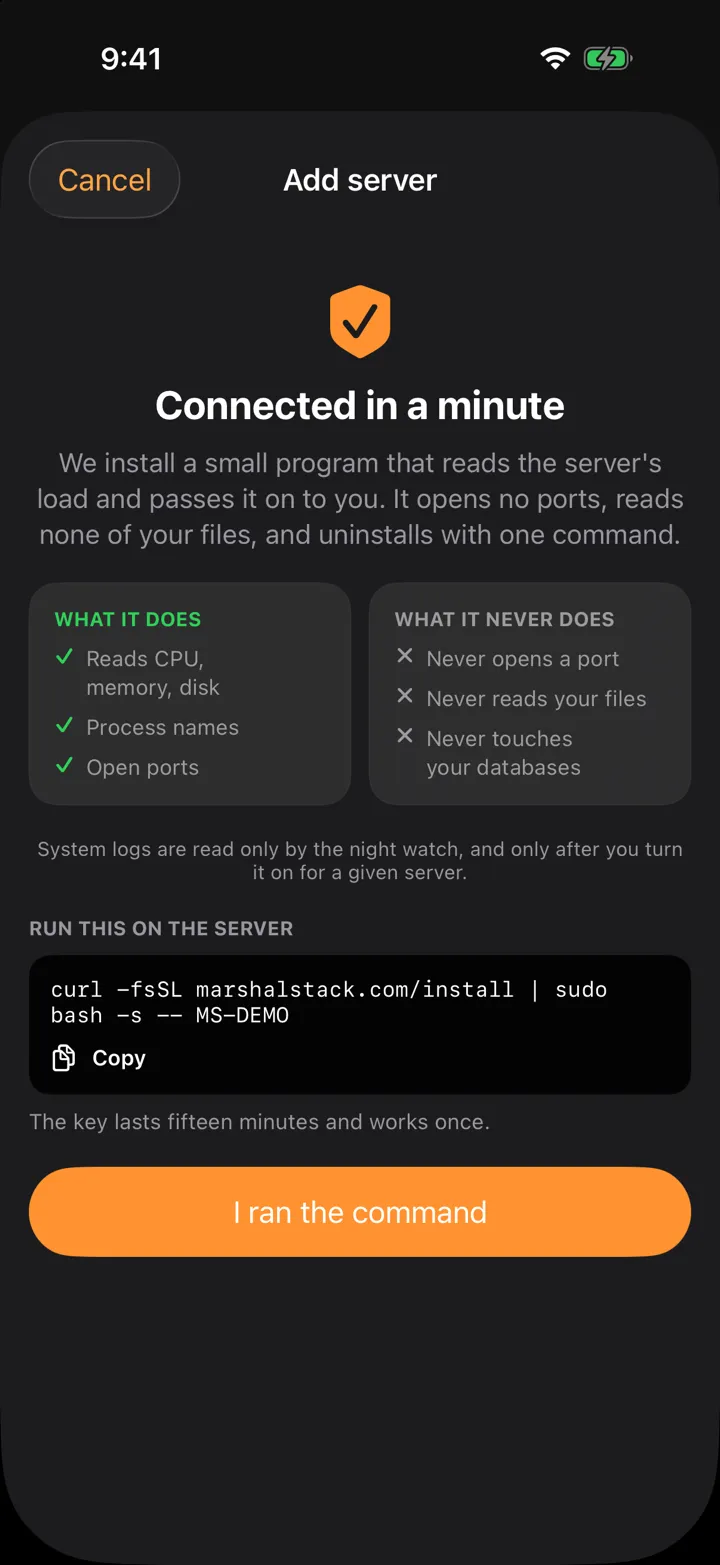
On the Servers tab tap +, then Add server. The app shows a command with a one-time key already inside — tap Copy.
Run it on the server
Paste it into a terminal on the server. It needs sudo, because load figures are read from /proc. By hand it looks like this — replace YOUR-KEY with the key from the app:
curl -fsSL marshalstack.com/install | sudo bash -s -- YOUR-KEYIt puts the agent in /opt/marshal-agent and adds a systemd timer that sends a reading every minute. The installer is plain bash, meant to be read before you run it.
Confirm in the app
Tap I ran the command. The server shows up in the list within a minute, under its hostname.
To see exactly what leaves the server, take one reading by hand — it prints what it sends:
sudo marshal-agent --onceTo remove it, one command undoes everything the installer did:
sudo marshal-agent-uninstallAlerts and thresholds
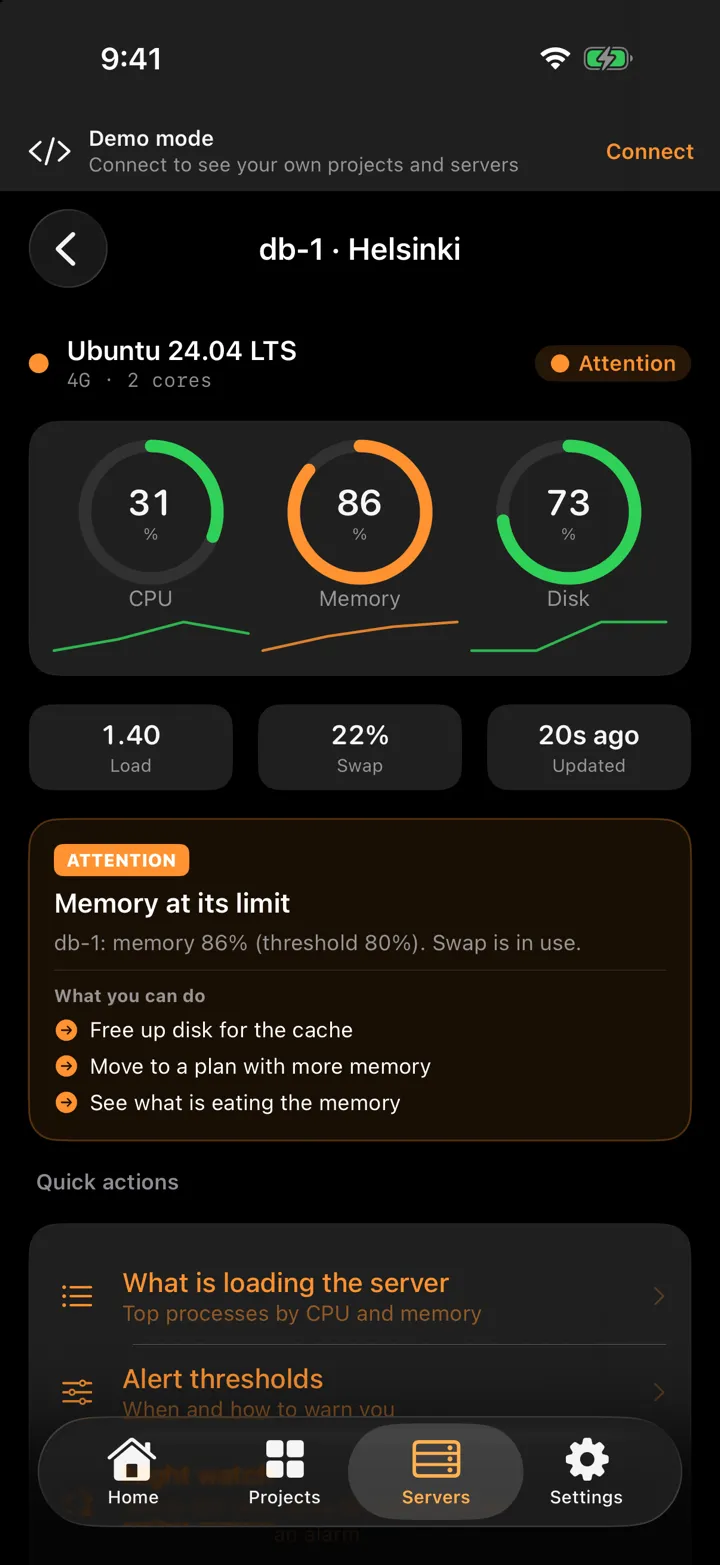
Tap a server for the full picture: CPU, memory and disk with their trend, load, swap and when the last reading came in. When something crosses a line, an Attention card says what happened and what you can do about it.
What is loading the server lists the top processes by CPU and by memory — names and shares, nothing else.
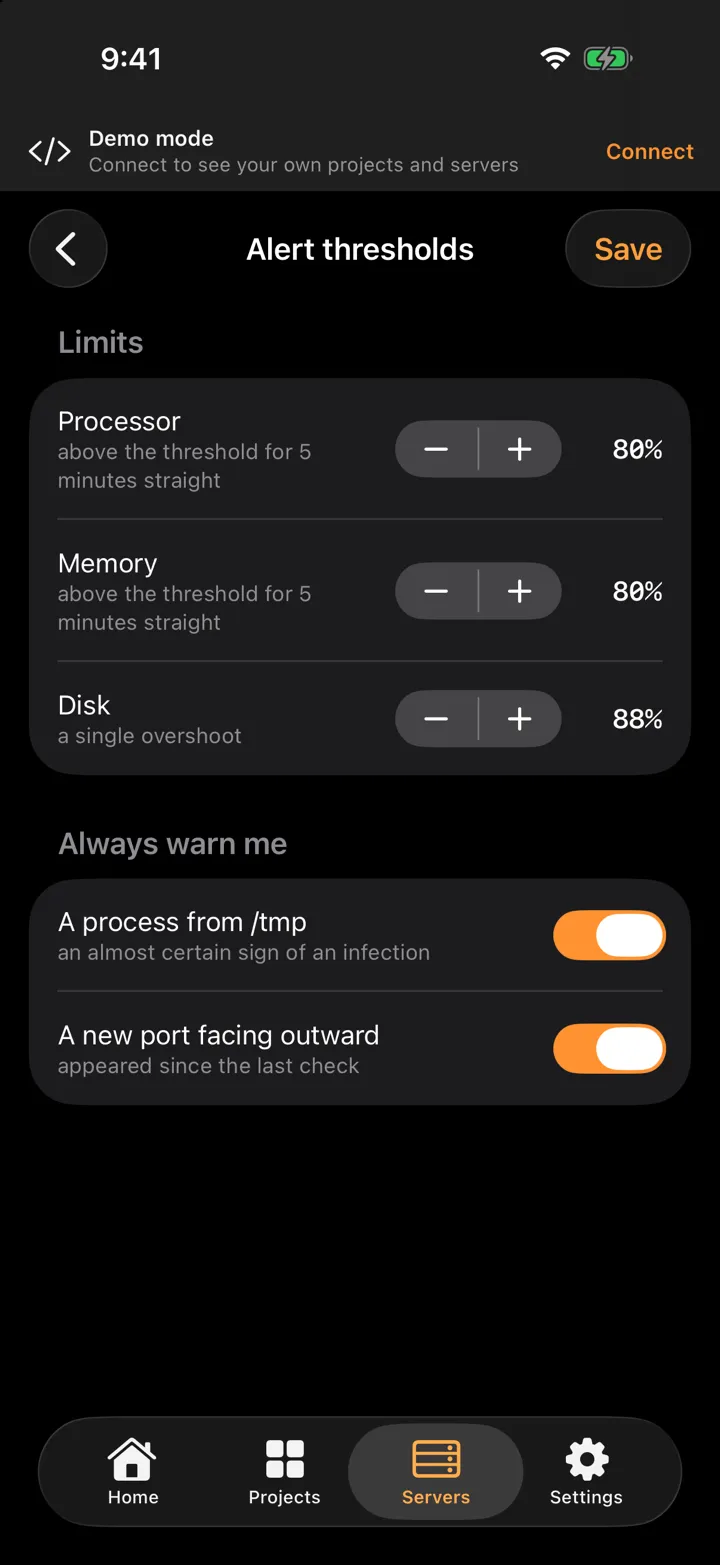
Alert thresholds decides when to warn you. CPU and memory alert after five minutes straight above the line (80% by default); disk alerts on a single overshoot (88% by default). Two more warnings are on unless you turn them off: a process running from /tmp — an almost certain sign of an infection — and a new port facing outward since the last check.
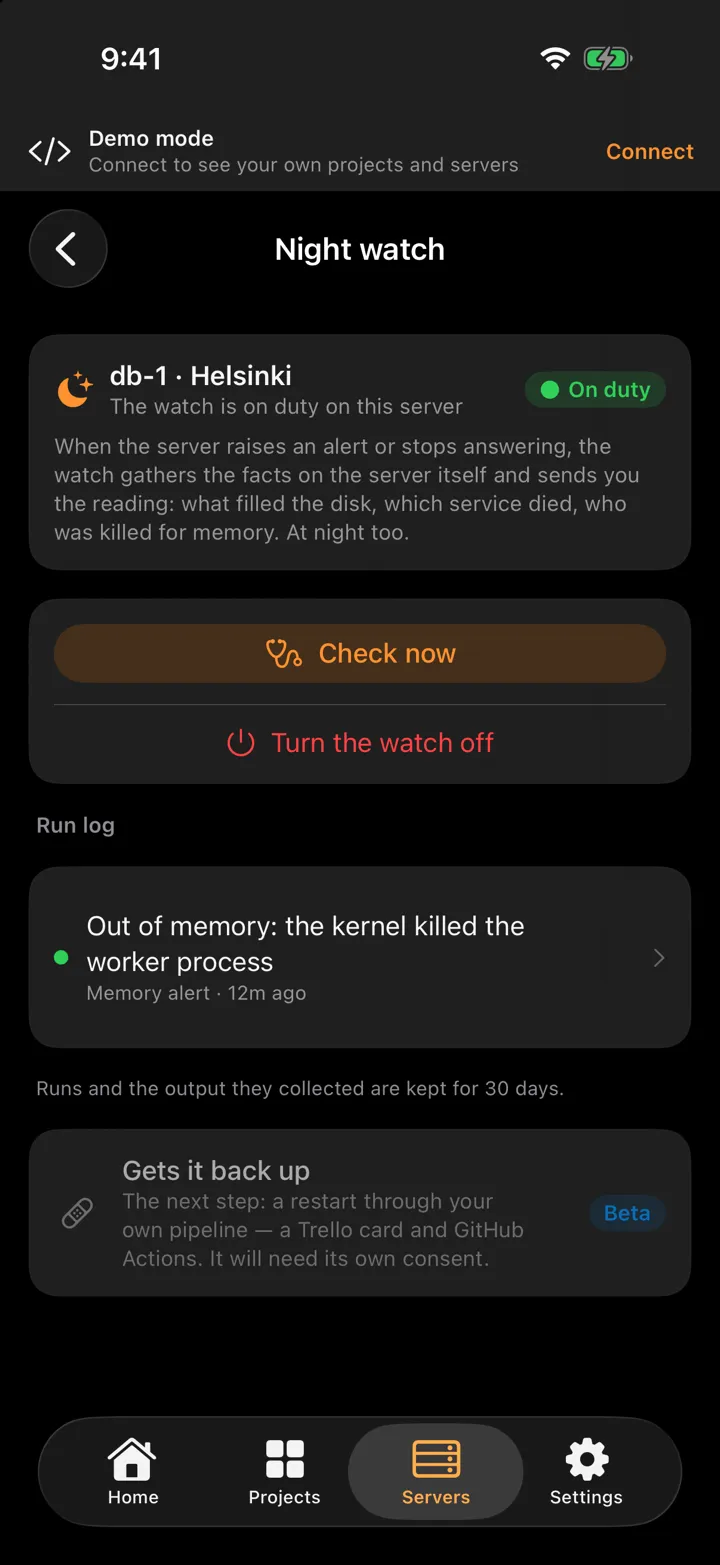
Night watch Beta
Off by default. You turn it on per server: Servers → a server → Night watch.
When the server raises an alert or stops answering, the watch gathers the facts on the server itself and sends you the reading: what filled the disk, which service died, what was killed for memory. At night too.
It only looks. Every command it may run sits in a fixed, read-only list inside the agent — print it with the command below — and secrets are masked before anything leaves the server. Check now runs it on demand; the run log keeps each run and its output for 30 days.
sudo marshal-agent --opsTo forbid the watch on a server whatever the app says, set DUTY=off in /etc/marshal-agent/agent.conf.
Notifications
Pushes come for what needs you: a store rejection, a new review, a backend that stopped answering, a server alert. Pick which in Settings → Notifications → Alerts.
With an Apple Watch paired, the Marshal Stack watch app lists your servers, worst first, with their load, and a complication on the watch face shows how many are up. Tap a server for its CPU, memory, disk and the active alert.
Telegram alerts
Want the same alerts in Telegram? Settings → Telegram alerts connects a bot of your own:
- Open @BotFather in Telegram and send /newbot.
- Copy the token it gives you, paste it in the app and tap Connect.
- Open your bot and tap Start — that links the chat to your account.
- Tap Send a test alert to check. Disconnect any time from the same screen.
The agent crew Early access
The crew — AI engineers that take tasks from your boards and work on them — is in development. The Your machines screen is open to early-access accounts only; if you have it, this is how to connect a machine for the crew.
This is a different agent from the server one: it runs Claude on your machine, under your own Claude subscription. Marshal Stack never sees your Claude login and never spends your limits — the work, and the tokens, stay yours.
What you need
- A machine that stays on — a Linux server (any small VPS) or a Mac — with python3 and curl available.
- A Claude subscription, signed in on that machine (step 2 below).
- The Marshal Stack app on your iPhone, signed in to an early-access account.
Prepare the machine
A small always-on Linux VPS is ideal; a Mac works too. Check that python3 and curl are there:
python3 --version && curl --versionSign in to Claude on the machine
Install Claude Code on the machine, then create a login token:
claude setup-tokenConfirm Claude answers:
claude -p "reply with exactly: AUTHOK"Generate your agent key
In the app, open Settings → Your machines (or the ⋯ menu on Control → Your machines). Under Add a machine, choose Server or Mac and tap Generate agent key.
Install the agent
Paste that command into a terminal on the machine. Setting it up by hand? It looks like this — replace YOUR-KEY with the key from the app:
curl -fsSL https://relay.marshalstack.com/agent/install.sh | AGENT_KEY='YOUR-KEY' bashIt downloads a small agent, builds an isolated Python environment, and installs it as a service (launchd on a Mac, systemd on Linux) so it keeps running and survives a reboot. Nothing else on the machine is changed.
Confirm and start working
Within a few seconds the machine appears under Connected now in the app. If it doesn't, check the log:
~/.marshalstack/agent.logThat's it. Tasks for this machine now run here, on your hardware, with your Claude.
The Your machines screen lists every key you've issued, which machine is online, and when each was last seen. Swipe a key to revoke it — that machine disconnects at once and the others keep running.
Troubleshooting
Server agent
- The server doesn't show up
- The key may have run out — it lasts fifteen minutes and works once, so open Add server for a fresh one. The server also needs systemd and outgoing HTTPS. Run
sudo marshal-agent --onceto see what goes wrong. - “run with sudo”
- The agent reads /proc, which needs root. Run the same command again with sudo in front of bash, exactly as the app shows it.
- Readings stopped
- Check the timer with
systemctl status marshal-agent.timer. If the server was reinstalled, remove the old entry in the app and add it again.
Crew machine
- “python3 is required”
- Install Python 3 (apt install python3 on Debian/Ubuntu, or brew install python on a Mac), then run the command again.
- “No agent key found”
- The key didn't reach the script. Re-run the command with AGENT_KEY set exactly as the app shows it, quotes included.
- Not showing as connected
- Check ~/.marshalstack/agent.log. Make sure the machine can reach relay.marshalstack.com over HTTPS, and that the AUTHOK check in step 2 passed.
- Doesn't survive a reboot
- A host without a service manager can't register the agent to auto-start. Use a Linux host with systemd, or a Mac that stays logged in.
Privacy and your keys
Store keys stay on the relay and are never shown again. Each server agent holds one key for one server and nothing else — delete the server in the app or run the uninstaller and that key is gone.
For the crew, your Claude login never leaves the machine. The agent key only lets that machine join your account on the relay — revoke it any time. Run that agent as a normal user, not root, unless you have a reason to.